
How to Wash a Backpack at Home: Easy Hand Wash Guide



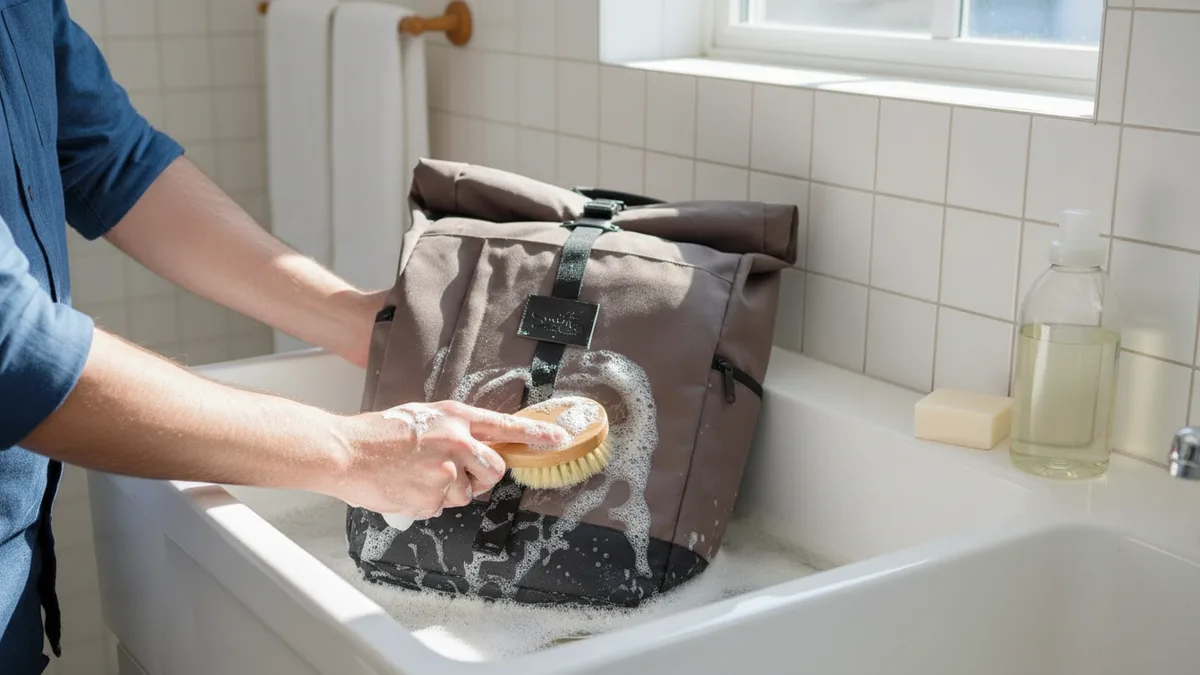
Backpacks are used daily for school, work, travel, hiking, and the gym. Over time, they collect dirt, sweat, crumbs, and odors. If you’re wondering how to wash a backpack at home, how to clean a backpack properly, or how to hand wash one without ruining it, the process is straightforward.
Most backpacks can be washed and cleaned at home with mild soap, cool water, and either a gentle hand wash or a delicate machine cycle. Before starting the cleaning process, you need to remember some key steps discussed in this guide.
A backpack (also known as a knapsack, rucksack, bookbag, or haversack) is a bag carried on your back using two shoulder straps. It evenly distributes weight across your back and hips, making it more comfortable than carrying items by hand. Backpacks are made from different materials such as nylon, polyester, and canvas, and some have internal or external frames to help carry heavier loads. Many newer backpacks also come with features like laptop compartments and charging ports that need extra care when cleaning.
Because backpacks are used daily and exposed to all kinds of environments, they need regular cleaning to stay in good shape. Market Research Future reports that backpacks are the most popular type of school bag, with a market share of around 60%, which shows how important they are for students, travelers, and commuters. With that level of use, dirt and grime build up quickly. From a school backpack to a travel or hiking pack, a washable nylon or polyester bag, or a canvas style with leather trim and mesh sections, it’s essential to know when to machine wash and when to spot clean or hand wash in order to protect and extend its lifespan.
Shop Custom Backpacks
View all backpacks →



How Do You Wash a Backpack by Hand? (Quick Steps)
You wash a backpack by hand in six steps: empty it, pre-treat stains, mix mild soap into lukewarm water, wash gently with a soft brush, rinse well, and air dry for 24 to 48 hours.
If you only have a couple of minutes, here is the hand-washing process at a glance. Each step is explained in detail further down the guide:
- Empty and inspect the backpack, removing any electronics, frames, and detachable straps.
- Pre-treat stains with a baking-soda-and-water paste (or dish soap for greasy spots).
- Mix your cleaning solution: 1–2 tablespoons of mild detergent per gallon of lukewarm water.
- Hand wash gently, focusing on straps, the bottom panel, and around zippers.
- Rinse thoroughly in clean water until all soap is gone.
- Air dry in a shaded, ventilated spot: never in a dryer.
Most backpacks (whether a school bag, a hiking pack, or a laptop backpack) can be hand washed safely this way. Only "smart" packs with built-in electronics should be wiped down instead of submerged.
How Do You Clean a Backpack: Hand Wash or Machine?
The safest way to clean a backpack is by hand with mild soap and lukewarm water; a machine is fine only when the care label says so. Spot cleaning with a damp cloth covers light dirt between full washes.
There are three ways to clean a backpack at home, and the right one depends on how dirty it is and what it is made of:
- Spot clean for light marks: a damp cloth, a drop of mild soap, then a clean-water wipe. This is the only method for packs with built-in electronics.
- Hand wash for a full, deep clean: the gentlest method for school, laptop, hiking and canvas backpacks. Every step is below.
- Machine wash only when the label allows it: cold water, gentle cycle, inside a mesh bag.
Can You Wash a Backpack in the Washing Machine?
Yes, if the care label says it is machine washable: wash it inside a mesh bag or pillowcase on a cold, gentle cycle, then air dry. Skip the machine for packs with leather trim, internal frames, or built-in electronics, and hand wash those instead. For settings, loading tips and what to do when a stain survives the cycle, see our step-by-step guide on how to wash a backpack in the washing machine. Hand washing, covered below, is still the gentlest option for most packs.
Why Do Backpacks Get Dirty?
Backpacks get dirty from sweat, spills, crumbs and grimy floors, and that grime mixes with moisture to cause odors, mold and worn fabric.
Backpacks get dirty because they’re constantly exposed to sweaty gym clothes, leaky water bottles, snack crumbs, and grimy surfaces like car trunks, classroom floors, or gym benches. Over time, this grime mixes with moisture and bacteria, leading to mold, mildew, and unpleasant odors. Dirt and grit can also abrade the fabric and straps if not cleaned regularly, gradually weakening the material.
How Often Should You Wash a Backpack?
Wipe the inside of an everyday backpack every couple of weeks and give it a full wash once or twice a year; wash sports and hiking packs after heavy, sweaty use.
Everyday school or work backpacks just need the interior wiped down quickly every couple of weeks, with a thorough cleaning once or twice a year. Sports, gym, or hiking backpacks need cleaning more often. In fact, it's wise to wash one after each heavy use or sweaty outing if possible. And regardless of type, stubborn stains, strong odors, sticky residue on straps, or visible mold spots are all clear signs it's time for a deeper clean sooner rather than later.
Regular cleaning keeps your backpack looking and smelling fresh and extends its lifespan. This is true whether it’s your daily school bag, a travel carry-on, or an outdoor hiking pack. A little maintenance goes a long way toward ensuring your backpack is always ready for the next adventure.
What Should You Check Before Cleaning Your Backpack?
Check the care label, remove all electronics and detachable parts, and test the soap on a hidden spot before you wash.
Before you start washing, take a few quick safety and care steps. Modern backpacks often come with built-in features like USB charging ports, battery packs, or even metal frames, which need extra care during cleaning. Skipping preparation can lead to damaged gear or a ruined bag, so work through these checks first.
Always check the care label first and follow the manufacturer's instructions: it will tell you if your backpack is machine washable, hand wash only, or requires special care, and some leather-trimmed backpacks or those with waterproof coatings may only be safe to hand clean. Remove all electronics and power sources, including power banks, chargers, headphones, or other gadgets; never wash a backpack with electronic accessories or batteries still inside. Detach removable parts such as hip belts, sternum straps, frame inserts, or any other detachable pieces, since these can often be cleaned separately and doing so prevents damage to both the parts and the bag. Empty every pocket: it sounds obvious, but check every compartment, zipper, and hidden pocket, shaking out crumbs, pens, coins, and debris, and use a small vacuum or a soft brush to get dirt out of seams and corners. Avoid machine-washing "smart" backpacks: if your backpack has integrated electronics or special sensors, do not submerge it. Wipe it down with a damp cloth and mild detergent instead, since submerging tech-enhanced bags can destroy their components. Test for colorfastness in an inconspicuous area by gently scrubbing a small spot with mild soap and water, making sure the color doesn't bleed or rub off before you wash the entire bag; this is especially important for brightly colored or printed backpacks. Protect special materials: if the backpack is waterproof or has a water-resistant coating, be gentle, and avoid hot water or harsh chemicals that could strip the coating (you can reapply a waterproof spray later). For packs with leather accents or trim, do not soak those sections. Clean leather parts separately with a leather cleaner or conditioner after washing the fabric. Finally, be mindful of logos and decals: many backpacks have printed logos or reflective patches, so avoid scrubbing directly on those designs with abrasive brushes or harsh cleaners, as they could fade or peel.
Taking these precautions will prevent damage to your backpack’s materials and features, keeping things like waterproof coatings, zippers, logos, and leather accents intact. A few minutes of prep can save you from ruining your favorite pack and will make the cleaning process safer and more effective.
What Soap Should You Use on a Backpack? (Backpack Soap & Detergent)
The best backpack soap is a small amount of mild liquid laundry detergent or a few drops of dish soap diluted in lukewarm water.
You don't need a special cleaner to wash a backpack. Avoid bleach, fabric softener, and strong solvents: they fade colors and strip waterproof coatings. The rule is simple: pick the gentlest soap that still cleans, and always dilute it. For a deeper dive on fabric-specific care, see our guide on how to clean nylon totes and backpacks.
Can You Use Dish Soap to Wash a Backpack?
Yes, a few drops of mild dish soap diluted in lukewarm water is a good backpack soap. It cuts grease from food and oil stains without harming nylon, polyester or canvas.
Is Hand Soap a Mild Soap?
Generally yes: an unscented liquid hand soap or castile soap is gentle enough for backpack fabric. Dilute it in water the same way you would a detergent.
What Supplies Do You Need to Clean a Backpack?
You need mild soap, baking soda or vinegar, a soft brush, a basin or tub, and a few clean towels.
Before you get started, choose an appropriate workspace. Cleaning a backpack can be a wet process, so pick a spot like a laundry room, utility sink, bathtub, or even outdoors. Make sure water and soap won’t harm any flooring or furniture in the area and that you have enough room to maneuver the bag, especially for larger travel backpacks.
Prepare the following tools and supplies:
- Mild detergent or soap: A gentle liquid laundry detergent or mild dish soap works well for most backpacks. Avoid bleach or harsh chemicals, as they can damage fabric and coatings.
- Stain remover or baking soda & vinegar: For pre-treating tough stains and odors. Baking soda can help with odors; white vinegar is great for mildew or smell removal.
- Soft brush or sponge: A soft-bristled brush (an old toothbrush works for crevices) and/or a non-abrasive sponge for scrubbing. These help remove dirt without tearing the material.
- Cloths or microfiber towels: Useful for spot cleaning and for drying sections of the bag.
- Large basin or tub: If hand washing, you'll need a container big enough to immerse the backpack, or use a bathtub.
- Clean towels: Have a few absorbent towels on hand for pressing out water after washing. Old towels are perfect.
- (Optional) Mesh laundry bag or pillowcase: If you plan to use a washing machine, a large mesh bag or pillowcase can protect straps and zippers from snagging. It’s not required, but can be helpful for delicate or older machines.
With your cleaning area set up and all the right supplies gathered, you’re ready to get your backpack clean effectively without causing any damage.
How Do You Wash a Backpack by Hand, Step by Step?
Follow the seven steps below, from emptying the bag to a final clean-water rinse.
Hand washing is often the safest way to clean a backpack, especially for those made of more delicate materials or with lots of attachments. It might seem a bit time-consuming, but it is worth the effort.
Follow these steps to wash your backpack by hand without harming it:
Step 1: Empty and Inspect Your Backpack
Completely empty your backpack inside and out: check every pocket, compartment, and those little hidden sleeves. You might be surprised by what lurks in the corners (crumbs, pens, old receipts, even moldy snacks). Unzip all zippers and shake the bag out upside down to get rid of dirt and small debris.
Remove any detachable components like hip belts, shoulder straps (if they unclip), metal frames, or support rods. You’ll wash those separately.
While handling the empty pack, take a moment to inspect it: look for loose threads, broken zippers, or weak seams. It’s better to discover any damage now than when the bag is soaking wet. If you do find minor damage, you may want to repair or reinforce those areas before washing.
Tip: Don’t skip the pre-inspection. Agitation in water can turn a small seam tear into a big rip, and fixing a loose strap or tiny tear beforehand is much easier than dealing with a soaked backpack that’s coming apart.
Step 2: Pre-Treat Stains and Problem Areas
Address any visible stains or really dirty spots first. This will make the overall cleaning more effective. For general grime or mysterious dark smudges, a simple paste of baking soda and water works wonders (about 3 parts baking soda to 1 part water). Rub the paste onto the stains gently and let it sit for 15-20 minutes this helps lift dirt and neutralize odors.
For greasy or oily stains (maybe from food spills or leaky snacks), apply a bit of dish soap directly to those spots; dish soap is designed to cut grease. Let the dish soap sit on the stain for about 15 minutes as well.
Different types of stains need different care:
For mud or dirt, brush off as much dried mud as you can first; if it's still wet, let it dry before you attempt cleaning, since scraping off dried mud is easier and prevents smearing it further into the fabric. For ink or pen marks, rubbing alcohol on a cotton swab can lighten the stain: dab carefully and test on a small area first to ensure it doesn't remove color from the fabric. For blood, use cold water and a little hydrogen peroxide, never hot water, since heat will set the protein and make the stain permanent; dab the area with cold water and a touch of peroxide, then rinse. And for general odors, if the inside smells funky (gym clothes, we're looking at you), sprinkle a layer of baking soda inside the main compartment and let the backpack sit overnight before washing, since baking soda absorbs odors.
After treating these spots, your backpack will already be on its way to looking better. Pre-treating is like giving especially dirty areas a head start so that the wash will be more successful.
Step 3: Choose and Test Your Cleaning Solution
Now, decide on a cleaning solution and always test it on a small area of the backpack. The best cleaner depends on your pack’s material:
For most synthetic backpacks (nylon or polyester), a mild detergent or a specialty gear wash is ideal. Fill a large basin or bathtub with lukewarm (not hot) water and mix in a small amount of mild detergent (roughly 1-2 tablespoons per gallon of water is plenty). Avoid hot water. It can damage certain coatings (like the waterproof layer) and may cause colors to run. Cold water is okay but not as effective at activating cleaning agents, so lukewarm is the sweet spot.
For canvas backpacks, you can use a slightly stronger approach. Canvas is sturdy, so adding a half cup of white vinegar to your soapy water can help break down heavy dirt and eliminate odors. The vinegar smell won’t remain after drying, but it’s great at killing mold and mildew.
If you have a leather trimmed backpack or one with leather patches/accents, remember that those parts should not be soaked with your normal detergent solution. Use a leather cleaner or saddle soap on the leather sections only, after you’ve washed the fabric. Regular soap can dry out or discolor leather.
For any special material or coating (for example, a waterproof backpack with a PVC lining), stick to mild soap and avoid anything with solvents or bleach. These packs often just need a gentle wipedown rather than a full soak.
Always test your chosen cleaning mixture on a hidden spot first. Turn the backpack inside out and pick an inconspicuous area on the interior or underside. Dab a bit of your soapy solution on, let it sit a few minutes, then rinse and check for any color change or fabric damage. If you see any dye coming off or the fabric color fading, dilute your solution further or switch to an even milder soap. It’s far better to take a cautious approach (clean twice if you have to) than to ruin your bag with a solution that’s too harsh. Once you’re confident that the cleaner is safe, you’re ready for the full wash.
Step 4: Wash the Backpack (Hand Washing)
Now comes the actual washing process. Submerge the backpack into your basin or tub of cleaning solution. Do this gradually rather than just throwing it in; easing the pack into the water allows air trapped in the foam or pockets to escape and lets the solution saturate the fabric evenly. If you drop it in too quickly, you might get air bubbles that prevent some areas from getting wet.
Using your hands, gently agitate the water and the backpack. Think of it like washing a delicate sweater you want movement, but not rough scrubbing that could damage the material. Massage the fabric with your hands to work soapy water through it. Pay extra attention to high-wear areas that gather the most dirt: the bottom panel of the bag, the shoulder straps where they sit on your shoulders (these often get sweat and body oil), and any area around zippers or pockets (dirt tends to accumulate along zipper lines and in pocket corners). For those especially grimy spots, you can use your soft brush or toothbrush. Scrub in gentle circular motions. Don’t use excessive force; you’re trying to lift dirt out of the fibers, not grind it in or fray the material.
If you encounter a stubborn stain that didn’t fully come out during the pre-treat step, apply a little extra detergent or stain remover directly to that area and give it a few more gentle scrubs. Take care with any mesh sections or netting on the backpack. These can snag or tear with aggressive scrubbing, so treat mesh pockets gently (a light scrubbing with a soapy sponge usually does the trick).
This hand-washing step might take a bit of time, especially if the backpack is very dirty, but thoroughness here means you won’t have to wash it again. Set a timer and gently agitate the pack in the soapy water for around 5-10 minutes to let the detergent do its job.
Step 5: Focus on Specific Components
While your backpack is soaking and during the washing process, make sure to clean all the nooks and crannies. Certain parts of a backpack benefit from special attention:
Zippers collect a lot of grit, so while the backpack is in the water, run all the zippers back and forth a few times to help flush out dirt from the zipper teeth, and use your toothbrush to scrub along the zipper coils and the pulls. Clean zippers slide smoother and last longer, since built-up dirt can make them stick or wear out. The shoulder straps and back panel, especially on hiking or travel backpacks, accumulate sweat, skin oils, and sunscreen; if these areas are really grimy or smell of sweat, you might even let them soak a bit longer than the rest of the pack. You can remove detachable straps and wash them separately in the same solution by hand, scrubbing gently and making sure to get into the padding creases. Plastic buckles, adjusters, and other hardware can have mud or sand stuck in crevices, so use the toothbrush to scrub around buckle hinges and in any small slots where dirt hides; take care not to bend or force anything, and if a buckle is removable, it might be easier to detach it to clean, then reattach later. If your backpack has mesh bottle pockets or mesh ventilation panels, treat them kindly: a soft sponge works well on mesh. Press the sponge into the mesh and gently rub, avoiding pushing your fingers through, as mesh can rip under pressure. The soapy water will do most of the work on these areas.
By addressing each component, you ensure that no part of the backpack is left dirty. Plus, this kind of detailed cleaning helps everything function better: straps slide easier, buckles snap more securely, and zippers glide without snagging after they’ve been cleaned.
Step 6: Address Lingering Odors
If your backpack still has a funky smell (perhaps that old gym-sock odor or a mustiness from being wet too long), a regular wash might not completely eliminate it. One effective trick for stubborn odors is a vinegar soak. After the main wash (or even during it), mix a solution of one part white vinegar to four parts water. Apply or soak the smelly areas in this vinegar solution for about 30 minutes. White vinegar is excellent for killing bacteria and mold spores that cause odors, and it won’t harm most fabrics. Don’t worry, the vinegar smell rinses out and won’t linger on your backpack.
Another odor-fighting tip: some people like to add a cup of baking soda to the wash water. Baking soda tends to work best as a pre-treatment (like we did in Step 2) rather than dumping it in the wash. If you haven’t already, you could make a baking soda paste and rub it into any still-smelly linings, then rinse it off. The combination of vinegar and baking soda (separately, not at the same time) covers both bacteria and odor absorption.
After these treatments, your backpack should smell a lot fresher. Just ensure you rinse out any vinegar or baking soda residue thoroughly in the next step.
Step 7: Rinse Thoroughly
Leftover soap in the fabric will leave a residue that can make the backpack feel sticky or attract dirt faster once dry. Drain the dirty wash water from your basin or tub. Refill it with clean, lukewarm water (no soap this time) and submerge the backpack again.
Slosh it around and gently swish the pack in this clean water. Then drain and refill again. You may need to rinse and repeat three or four times with fresh water until you’re confident that all soap, vinegar, or baking soda is gone.
As you rinse, pay special attention to areas that tend to hold soap: seams, pockets, and padding. Often, you can squeeze padded areas (like shoulder straps or back panels) while they’re underwater and see soap bubbles coming out keep doing this until no more bubbles appear. Similarly, pinch along seams and in pockets under the water to flush out any detergent lurking there.
Do not wring or twist the backpack fabric during rinsing, as that can damage fibers and any waterproof layers. Instead, just submerge and squeeze gently. It may take a bit of patience, but thorough rinsing now will prevent that crunchy or soapy feel later.
At this point, your backpack should be clean and soap-free. Now it’s time to get it dry so it’s ready for use again. (After completing the hand washing steps, skip down to “How Do You Dry a Backpack” for the correct way to dry and finish up the process.)
How Do You Dry a Backpack, and How Long Does It Take?
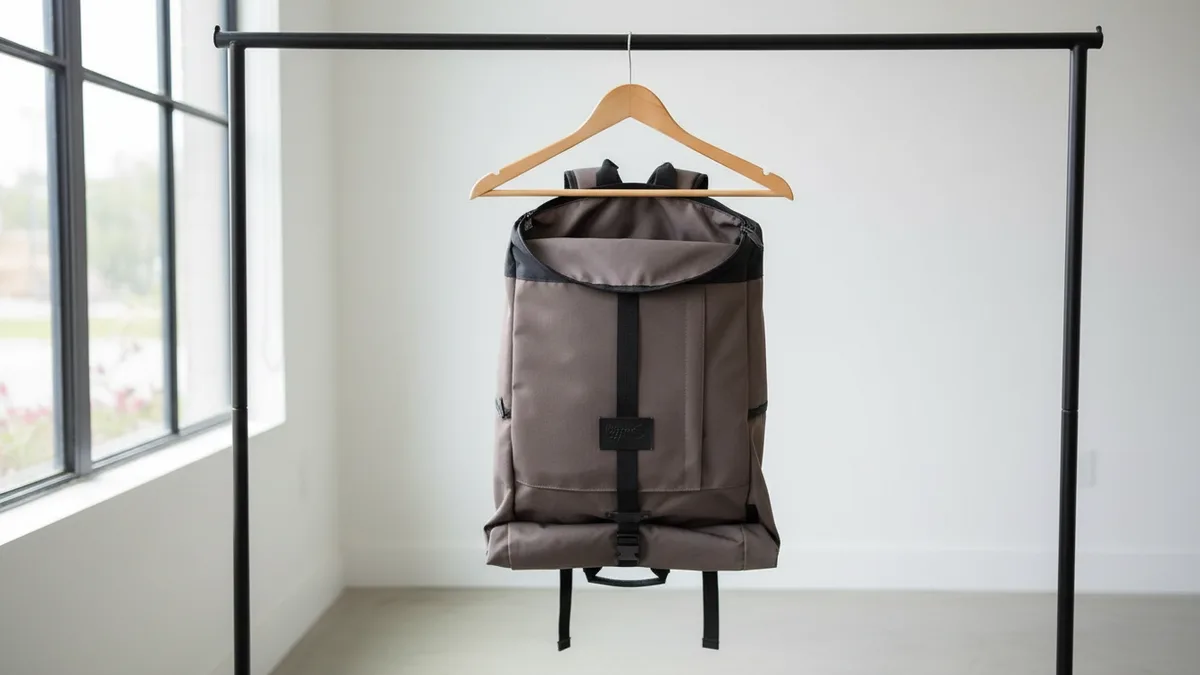
Air dry it open and hanging in a shaded, ventilated spot; a backpack takes 24 to 48 hours to dry completely inside and out. To dry it faster overnight, blot out excess water with towels, hang it open in front of a fan or dehumidifier, and turn it inside-out so the padded areas dry too.
Can You Put a Backpack in the Dryer?
Generally no: air drying is the safe choice, and a tumble dryer should only be used on no-heat or the lowest setting when the care label allows it. High heat and tumbling can shrink fabric, melt plastic buckles and foam padding, and ruin waterproof coatings. Hair dryers and heaters cause the same kind of damage, so dry the pack with airflow instead, using the steps below.
1. Remove Excess Water: Support the backpack from the bottom and gently squeeze water out: never wring or twist. Blot with clean towels, pressing inside compartments and straps. Replace towels as they get soaked. The drier you get it now, the faster it will air dry.
2. Air Dry in a Ventilated Spot: Choose a shaded, well-ventilated area indoors or outdoors. Avoid direct sun to prevent fading or material damage. Open all zippers and pockets, hang by the top handle, or drape over a drying rack for maximum airflow. Turn the bag inside-out if possible to dry padded areas faster.
3. Speed Up Drying: Use a fan or dehumidifier to move air through the backpack, especially in humid climates. Aim airflow into the main compartment and reposition the bag every few hours. Do not use hair dryers or heaters. High heat can cause damage similar to a dryer.
4. Reshape While Damp: Smooth out straps, padding, and corners before they fully dry to prevent stiffness or clumping. Massage foam areas to keep them even. Adjust pockets and panels so they dry in their natural shape.
5. Final Check and Post-Care: Let the backpack dry 24–48 hours until completely dry inside and out to prevent mildew. Test zippers, clasps, and straps. If zippers feel stiff, rub a graphite pencil or candle wax along the teeth for lubrication. For hiking or travel packs, reapply a durable water-repellent (DWR) spray once dry to restore water resistance.
How to Clean a North Face, JanSport or Osprey Backpack
Branded backpacks clean the same way as any other pack: read the care label sewn inside, then hand wash with mild soap and lukewarm water and air dry. The label is the instruction that matters, because materials, coatings and frames vary from model to model, even within one brand.
How Do You Clean a North Face Backpack?
Follow the care label inside the pack; for most fabric daypacks, that means spot cleaning or a gentle hand wash with mild soap, then air drying. Pay extra attention to padded laptop sleeves and shoulder straps, which hold the most sweat, and avoid hot water on any water-resistant finish.
How Do You Clean a JanSport Backpack?
Check the care label, then hand wash it in lukewarm water with a little mild detergent and let it air dry open. Classic school bookbags are simple to clean by hand, but suede or leather bottoms and trim should be kept out of the soak and cleaned with a leather cleaner instead.
How Do You Clean an Osprey Backpack?
Remove any hydration reservoir and detachable parts, follow the care label, and hand wash with mild soap, a soft brush and lukewarm water. Hiking packs with frames, hip belts and mesh back panels should never be wrung or put in a dryer; let them air dry in the shade.
Frequently asked questions
How Do You Get a Bad Smell Out of a Backpack?
Soak the smelly areas for about 30 minutes in one part white vinegar to four parts water, then rinse well. For a lighter odor, sprinkle baking soda inside the empty bag overnight before you wash it.
How Do You Clean a Backpack That Cannot Be Washed?
Spot clean it with a damp cloth and a little mild soap, then wipe it again with clean water and let it air dry. This is the right method for smart backpacks with built-in charging ports or batteries.
How Do You Clean Backpack Straps?
Scrub the straps with a soft brush dipped in diluted mild soap, squeeze the padding under water to flush out sweat, then rinse until no suds appear. Detachable straps can be washed separately in the same basin.
How Do You Remove Mold from a Backpack?
Brush off loose mold outdoors, soak the spots in one part white vinegar to four parts water for about 30 minutes, then wash, rinse and dry the pack completely in fresh air. Never store a backpack until it is fully dry, since damp fabric is where mold starts.
Conclusion: Keep Your Backpack Clean and Ready for Every Adventure
Learning how to wash, clean and care for a backpack the right way keeps it looking fresh, odor-free, and durable for years to come. Hand washing or a gentle machine cycle both share the same essentials: prep your bag, use mild detergent with cold water, and always air dry your backpack to protect straps, zippers, and coatings. Regular cleaning prevents dirt, sweat, and bacteria from breaking down the fabric, making it last longer and perform better.
Now that you know the step-by-step process, it’s time to put it into practice. Grab your favorite school bag, gym backpack, or travel pack and give it the care it deserves. Cleaning smaller carry items follows the same gentle-soap, air-dry principles: for example, our quick guide on how to care for fanny packs uses the same approach. For more care tips, cleaning guides, and custom backpack options, explore our collection at Promotional Product Inc.
If your bag is beyond saving, it may be time for a fresh one. Browse durable, easy-to-clean styles like the Quilted Nylon Cinch Backpack, the Tahoe Weekender Backpack, or the Alpine Ripstop Hiking Backpack, all customizable with your logo, or see every style in our custom backpacks collection.
Need custom backpacks for your team or event?
Shop Related Categories
Share this post with your team
Send it to a colleague or save it for later.
Related Articles

Custom T-Shirt Cost: What Drives the Price and How to Pay Less in Bulk
What sets the price of a custom T-shirt, how quantity breaks work, how to read a price table, twelve ways to pay less, and a copy-ready quote request with a free printable worksheet.

How to Put a Photo on a T-Shirt: Methods, Photo Size and a Free Checklist
A step-by-step guide to printing a photo on a shirt: how to tell if your photo is big enough, which print method suits it, what to send with your order, and a free printable checklist.

Retirement Plaque Wording and Award Wording Examples
Not sure what to write on the plate? Copy these retirement plaque wording ideas and award wording examples for retirement, appreciation, achievement, dedication, and more, then adjust the names and dates.

How to Run an Employee of the Month Program That Works
A good employee of the month program is simple, fair, and easy to repeat. Here are the steps, a sample criteria list, and reward ideas that keep people motivated all year.